

Introduction: The Cardboard Table


Moving to a new house I was in need of a new coffee table. Having all the packing boxes lying around I thought why not I use these cardboard to make a table? My Rule #1 of DIY project is to get inspiration from Instructables. There are a lot of cardboard table projects to be referred to but my favorite is the Cardboard Coffee Table by MakeItSo. As for the table legs I decided to use cardboard tube with reference to Fake Wood, Cardboard Table by rcvpedersen & Super Simple Cardboard Table by Thursday.
Step 1: Design


At first I wanted to build the table from scratch – by using the cardboard sheets. Then I realized that I have one big cardboard box I use to store my stuff. It will be easier to modify that box to become a table than to create one from nil. However I was reluctant to lose my storage box for a coffee table so I decided to combine both – a storage box + coffee table.
The idea is to cut down the box height, add cardboard tube as support and use the box top cover as the table top. The table top can be slide open to access the table storage.
Step 2: Gather Your Tools & Materials


- Corrugated Cardboard Box - preferably the Half-Slotted Container (HSC) because the open-top cover can be converted as table top.
- Corrugated Cardboard Sheets.
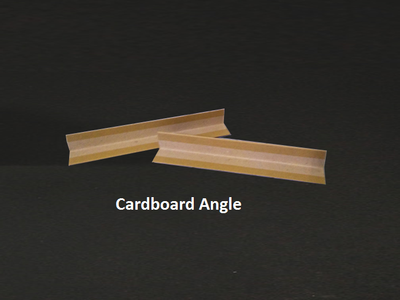
- Cardboard Angle – I don’t know what this thing is actually called, it’s the L-shape cardboard found in the cardboard box to protect the edges.
- Cardboard Tubes – 4 pieces.
- White PVA Glue.
- Screws – various sizes.
- Screwdriver.
- Staple Gun.
- Hand Saw.
- Craft Sticks – a lot.
- Cutter.
- Round Fridge Magnets – 4 pieces.
- Paint.
- Wallpaper, sticker type – 1 roll (5 mtr).
Step 3: Build the Support Beam


My cardboard box is too tall for a coffee table. So firstly it needs to be trimmed over so that the final height is only 400 – 450 mm. Next is to create a support beam to place the table top. This is done by cutting open the top corner of the box and folds it over into a rectangular beam shape. Use glue and screw to fix the folded beam onto the box. Do this on all four corners.
Step 4: Build the Guide Rail

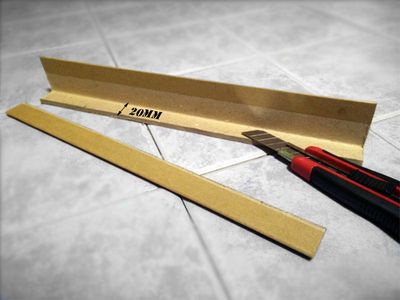
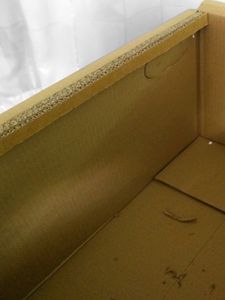


The table top will slide open on top of the support beam. To make this work use the cardboard angle as the slide rail. The bottom of the slide rail is trimmed at 20mm length. Simply add a strip of cardboard with a thickness of 20mm at the inner sides of the cardboard box. This will act as the guide rail. Next you need to cut open the L-shape on the box side so that the cardboard angle able to slide out.
Step 5: Build the Table Legs


Get the cardboard tube and remove ¼ of the circumference, as shown in the picture above. I use handsaw (poor guy method) and cutter to cut the tube. Leave 25mm of tube’s bottom to become the bottom support. Glue + screw the tubes to each edges of the box. Now you have a table box with a 25mm clearance from the floor.
Step 6: Build the Table Top


Believe it or not, I’ve spent most of the time making the table top than the rest of the parts. First cut the box top cover into equal half. Make a cuboid out of the cover with the following size: 40mm length, 39mm width, and 25mm thickness. Attach the side rails to the bottom of the cuboid. Fill in cardboard strips inside to reinforce the table top. The difficult part is to ensure that the two table tops are perfectly aligned to each other while at the same time able to smoothly slide open on the table. I add a ‘hole’ at both ends to assist in opening/closing the sliding tops. I also add fridge magnets onto the connecting edge to lock the table top when joined together.
Step 7: Plastering & Painting


Use Putty filler to fill in any holes, gaps and uneven surface before the painting. At this step I add a ‘frame’ on the table top using mounting board. Ideally, the surface has to be flat and clean for the next step. Paint the whole thing except for the table top surface.
Step 8: Add Wallpaper


It might be weird to cover a box/table with wallpaper but I think it’s the easiest way to decorate the otherwise plain + boring table. I use the sticker type wallpaper which is very convenient to work with. Simply measure the length of the side, cut the wallpaper and stick it on. As you can see some areas of the wallpaper have bubbles because of the surface roughness. Therefore it is important to prep the surface properly before applying the wallpaper.
Step 9: Table Top Finishing


I wanted to make something different for the table top so I decided to cover it with craft sticks – yep, craft sticks. Use cutter to trim the sticks to variable length and glue it on top of the cardboard. In the end I used up around 250 sticks in total. It’s a tedious work and kinda satisfying at the same time. Placing the sticks piece-by-piece feels like completing a huge jigsaw puzzle. Lol
And finally I have my new coffee table – I wouldn’t say it’s the prettiest coffee table ever but now I have a table + storage box. Two-in-one!

Participated in the
Before and After Contest 2017


